Salutations! Welcome to the second part of my post on my replica of Penny’s Sword from Rooster Teeth’s animated web show RWBY. If you haven’t read part 1, go ahead and check it out. When we left off, most of the parts were shaped and primed but not yet assembled. This time we’ll get into the painting, and some of it might be hard to visualize so take a look at the tournarounds if you’re not sure what I mean. Without further ado…
Blade, Guard and Grip
The blade and grip needed to sit perfectly flush with the guard, and the easiest way to fix parts that don’t quite fit together is The Bondo Squish. This is a very versatile technique, well worth keeping in your bag of tricks. The basic idea is that you spread Bondo on one object, coat the other in something the Bondo won’t stick to, and squish them together. Let the Bondo cure for an hour or so and then you can separate them, clean up the squeeze-out and now you have an inverse mold of one object in the surface of the other. I’ve also used this trick to straighten up lines on parts by clamping them to the flat surface of my workbench. In this case, I used regular scotch tape on the guard ring and sprayed on a bit of old mold release. I had to repeat the process several times for the joint between the blade and the guard to build up enough Bondo to fill the entire gap, but in the end it worked out quite nicely. The steel rod in the center of the blade provided good registration to keep the guard in the right place each time. Once I was satisfied, I epoxied these three parts together permanently.
At this point, I was able to hold the sword by the handle - the steel core means it’s quite able to support its own weight. That weight is considerable - MDF and steel aren’t light. I wouldn’t want to have to carry this around a convention floor all weekend, but it works fine as a shelf piece.
Learning to Solder
At this point, I knew I had to install the EL wire in the blade. In a perfect world, I would have waited until after the painting was done, but this sword has some parts that had to be constructed on top of the light diffusers, so that wasn’t an option.
I got my EL Wire from CoolNeon, and they live up to their name. I made the rookie mistake of forgetting to order connectors to attach the wire to the driver and they included four of them for free with a nice note in the package. Shipping costs from California to Canada are pretty rough, but the wire is tough, bright and easy to work with.
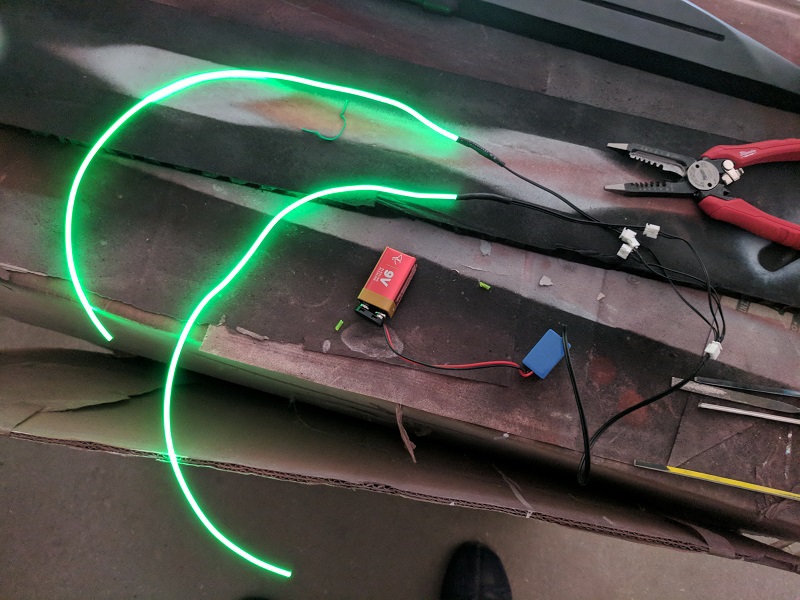
If you’re not familiar, EL wire works like this. You connect a battery to a piece of electronics called a driver, which is then wired (either through connectors or directly soldered) to the wire itself. Different drivers can power different amounts of EL wire - I went with one of the smallest ones because I wanted to hide the driver and battery inside the guard. CoolNeon sells the wire pre-soldered, but that costs extra and I wanted to learn how to solder anyway.
It turns out to be pretty easy. I bought a soldering iron, some solder and some copper wire to practice on at my local hardware store, watched some YouTube videos on soldering (good examples are this one by PunishedProps and this one by CoolNeon). After a couple of tries, I pretty much had it figured and I was able to complete the soldering for the first two pieces of EL wire in about an hour.
I glued the two strips of wire into the grooves on the blade with thin CA, scuffed up the clear acrylic light diffusers with some sandpaper and glued those in as well with epoxy. They didn’t sit quite flush owing to my mixup with the groove depth earlier, but it’s good enough.
Side Details
This sword has some extra little black- and copper-colored details on the side of the blade where it folds in half to become a gun (Of course it’s also a gun. Every weapon is RWBY is a gun somehow.) Of course, mine doesn’t transform but it’s important to look as though it could. This wasn’t too hard. I used a plastic scoring knife and some chisel work to cut out a couple of window shapes in 1mm styrene and glued them to solid squares of thinner styrene with Bondene (not to be confused with Bondo. Great naming, folks). Then I cut a thin strip of 1mm styrene and, with a lot of CA and filing, cut it into parts and made a continuous strip around the middle of the blade. Then I glued on the square window-things I’d made. Finally, I used a razor saw to make a thin cut through the styrene all the way around the blade to make it look like the blade was segmented. At this point, everything was done and ready for paint.
Painting the Grip
I started the painting process by masking off the guard ring. I always use the good (if expensive) Tamiya masking tape to start with - I’ve found it works better at preventing leaks, handles curves better and never pulls up paint. Of course, I’m also cheap, so I fill in the rest with regular hardware store masking tape and paper towel.
For the grip, I went with the plain grey primer as the color for the raised sections (hey, if it works…) and Montana Gold’s Stealth Grey for the inner section (I’m not giving an Amazon link for that one because the prices are outrageous. If you’re in Saskatoon, buy it from Art Placement Art Supplies instead). Montana Gold is good spray paint, but their cans tend to lay down very thick coats that don’t dry very smoothly, so I prefer to decant the paint and spray it through my airbrush instead. I use a Model Master B22, but to be honest that’s a lot more fancy than I really needed - I got it on sale, but I’d recommend sticking with something cheaper and simpler. I don’t have a good way to decant the paint except to spray it by hand into a glass jar, so if you have any better ideas I’d love to hear them.
At first, I coated the whole grip with the Stealth Grey, masked the inner portion and added the light grey primer, but the cheap masking tape pulled up the thin layer of stealth grey. Then I realized that I’d done it exactly backwards. I coated the whole thing in light grey primer, masked out the raised sections and added the stealth grey. After removing the masking tape and giving the whole grip a coat of Montana Gold matte varnish (right from the can) I moved on to the guard.
Painting the Guard
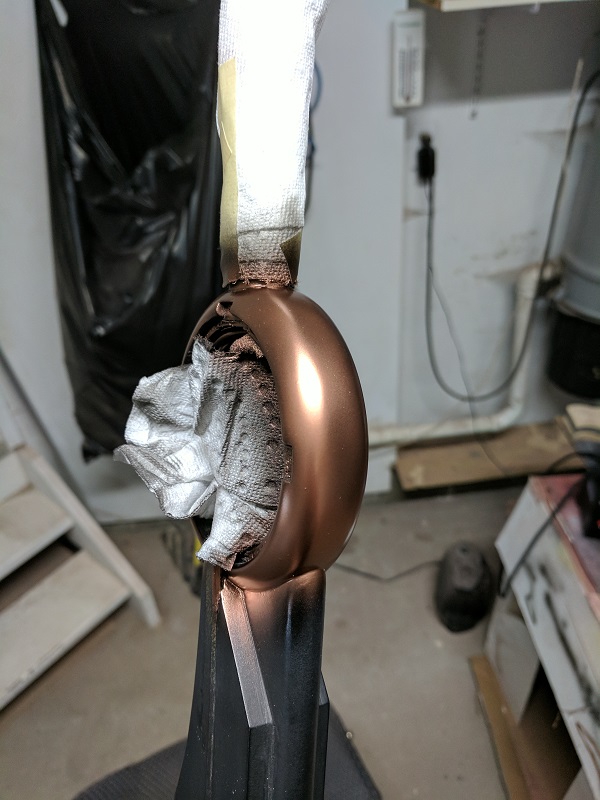
The guard of Penny’s sword is a bright orange copper color. I wasn’t able to match it quite right (if you’re following along at home I’d suggest spraying the copper on top of an orange-ish base coat) but it worked well enough I guess. I started by wet-sanding the guard to 600 grit. Honestly, I probably should have gone higher. For a convincing smooth-metal finish, you want even the primer to be as smooth as you can get it.
I started by airbrushing on a couple of coats of Alclad Gloss Black Base. The glossy paint provides a smooth surface to build the metal layer on. After that, I used Alclad II Copper for the shiny copper layer and Alclad Aqua Gloss for the clear coat. If you’re in Saskatoon, you can buy all of these Alclad paints cheaper at Express Hobbies, but they’re often sold out.
Overall, this worked quite well. I’m very pleased with the Alclad paints - they spray well, cover well and look great. The Aqua Gloss does have a sort of plastic-like texture to it that doesn’t feel as much like metal as the bare paint does, but that’s a pretty small issue.
Painting the Blade
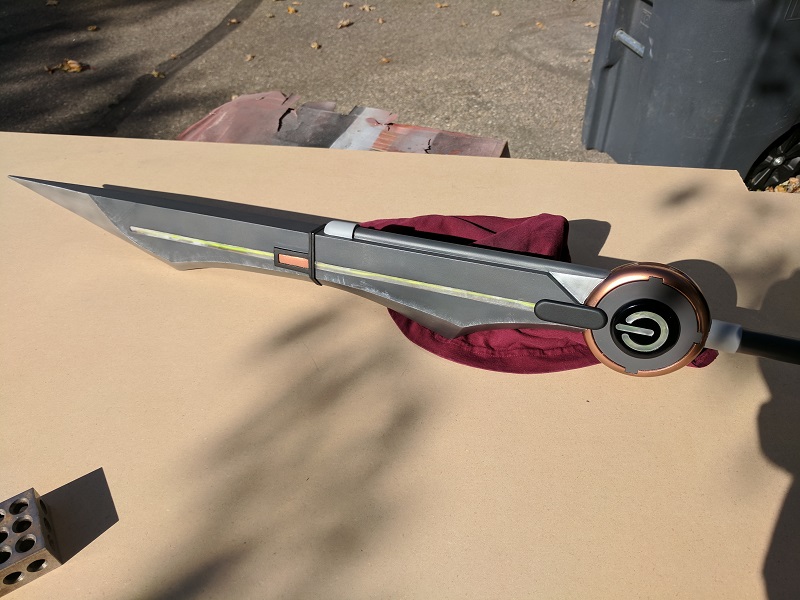
The blade has the most complex paint job of the build, but mostly because it has a lot of small areas that needed to be done separately. To start with, the most important bit is to avoid getting any paint on the acrylic light diffuser, so I masked that off straight away.
I started with a generous coat of stealth grey for the whole blade, again using my airbrush to put down a finer coat than the spray can would have done. Volpin Props’ Painting and Weathering for Props and Replicas book has a technique where you can bring up a bit of gloss on dark grey or black matte paint by rubbing it with cloth covered in charcoal dust. I couldn’t get it to work here. Maybe I was using the wrong charcoal. Anyway, I left the sides of the blade with the stealth grey and moved on to the edge.
Another trick I learned from Volpin’s book is how to create a brushed-metal look with Testor’s Buffable Metalizer lacquers. I’ll not give away the secret here (Volpin’s book is well worth the 8$) but it worked beautifully. I used the Aluminum and Titanium shades on top of the same Alclad gloss black as a base, then sealed it with the Metalizer sealer. Other details on the blade were done with the same cast of colors and techniques I’ve already mentioned - matte black primer for the styrene detils, light grey primer for the end of the rail on the spine, gloss black, copper and aqua gloss for the copper bits and aluminum metalizer for the little section where the spine of the blade meets the guard. I did mistakenly mix the metalizer with sealer rather than thinner for that last bit, but it seemed to work alright anyway. I couldn’t shine the resulting paint by buffing it, but it’s not a big deal.
Overall, I think I like the Alclad paints more than the Testors, but I don’t know if the Alclad paints would work for the brushed-metal trick or not, so might be best to have both.
I didn’t do much weathering on this build because I wanted to match RWBY’s bright and clean art style. I did a bit of silver dry-brushing around the line between the brushed-metal effect of the edge of the blade and the dark grey of the sides, but I think I did too much there. It’s easy to go too far with dry-brushing, I find.
Guard Covers
The guard on Penny’s Sword has these complex little power-symbol icons on either side. I couldn’t cut something that perfect by hand, so I used lasercut MDF and acrylic. The power symbol is constructed out of a piece of MDF with the symbol cut out, and two small pieces of acrylic to fit in those holes and a larger acrylic ring to hold the power symbols and fit into the guard. These power symbols have to light up, so they have EL wire inside as well.
To start with, I primed the flat rings, painted them stealth grey and clear-coated them with matte varnish. The MDF power symbols were painted with gloss black and clear-coated with aqua gloss. I set the power symbols face-down on my workbench, slid the acrylic power-symbol parts into them and glued them in place with hot glue. CA wouldn’t have worked well - it clouds the surface of acrylic too much and would have run through the gaps and stuck everything to my workbench - but ordinary hot glue was thick enough and clear enough to work just right. I glued the power symbols to the guard covers with epoxy. I did have to redo one of them twice due to mistakes (make sure everything is lined up before you glue things together!) but I got there in the end.
After that, it was smooth sailing. I hot-glued down some more EL wire to the backs of the power symbols, soldered on the connectors and I was ready for final assembly.
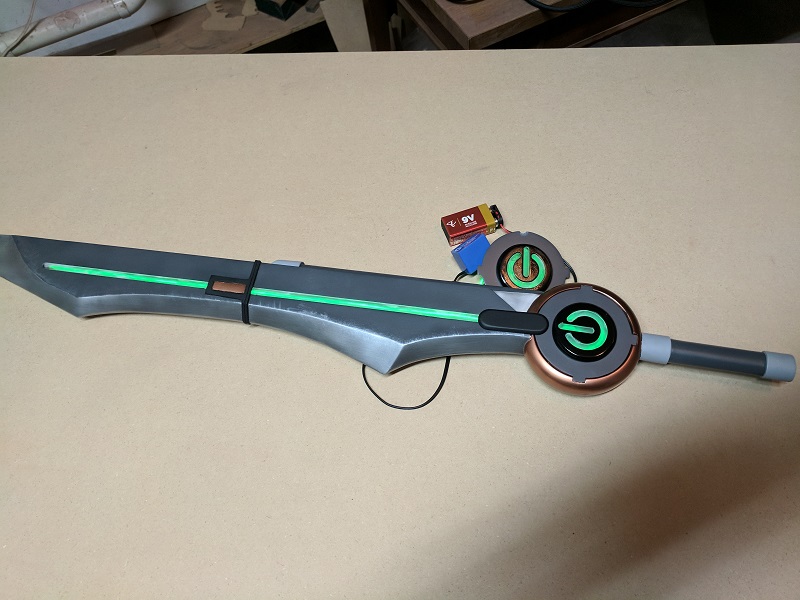
Final Assembly
Most of the sword was already together so this was limited to putting the guard covers in place, hooking up the electronics and gluing on a couple of extra bits. There is one thing to note though. Although I had enough space inside the guard for the battery and driver (though I had to cut out part of the guard to make room for the battery) I didn’t leave enough space for all of the wiring and connectors. Sadly, I can’t actually close the guard with everything inside, so I’ll have to leave some of the guts hanging out when I want to light it up. Anyway, you probably want to see some pictures of the final result, so here you go:
Conclusion
Thanks for reading! This build took me about six months, but I had a lot of fun with it and learned a ton of new stuff - soldering, lasercutting, airbrushing. Whether you’re building your own replica of Penny’s Sword or just interested in learning more about propmaking, I hope you found this useful. Cheers!