In this post, I’ll show you how I built a light-up replica of Penny Polendina’s unnamed swords from Rooster Teeth’s excellent animated web show RWBY. RWBY is what originally got me into propmaking - I’ve already made Yang’s Ember Celica shotgauntlets and Adam’s Wilt & Blush Sword/Shotgun Combo. This is the first time I’ve documented my process, so hopefully you find it useful.
Blueprints & Design
First, a quick overview of how I intended to do this build. A lot of this plan didn’t survive contact with reality, but I think it’s helpful to show where things went off the rails. The plan was to make the blade out of two pieces of 1⁄2” MDF laminated together around a steel rod, to have a secure place to attach the hilt and guard. The light-up detail along the blade would be done with EL wire or LEDs covered by a thin layer of scratched-up acrylic glass to diffuse the light. The other details on the blade would mostly be made of wood, MDF and styrene. I wasn’t sure how to cut or sand the bevel for the edge of the blade, planning to figure that out when I got there. The guard was difficult - it’s a more complex shape than it appears. It isn’t just a disk - the center is dished in a bit. I also needed it to be hollow, since that’s where I’d put the batteries and electronics to make it light up. The right way to do it is with a lathe, but I don’t have a lathe or any idea how to use one. The hilt would also be a challenge - it’s oval shaped, not round. I planned to cut it out of a wooden dowel with a spokeshave and make the extra details out of styrene, planning to fall back to 3D printing if that didn’t work.
As usual, I started by finding reference material and tracing out some blueprints in Inkscape. Reference material for RWBY is usually pretty easy to find, since Rooster Teeth often releases detailed turnaround shots of the characters and their gear for exactly this purpose. The RWBY wiki features a number of images of Penny’s swords, incuding detailed concept art and a ‘turnaround’ which shows the animation of the swords transforming.
Blade
This is the part I did last fall. I took a big block of 1⁄2” MDF to my local makerspace and put it on the CNC mill. I came up with some plan to use the manual control mode of the mill to cut the block into two halves of the blade, which I would then glue together. I milled a 1⁄4” round groove down the center of the inside of the blade to hold a steel rod for reinforcement. Then I flipped each piece over and milled a second groove on the outside of the blade for the light-up section. Unfortunately, I’ve completely forgotten the exact process I used to do this so I can’t give more details. I’ll take better notes next time.
Fast forward six months or so and it’s time to glue this thing together. I scuffed up the in-sides of the MDF and the steel rod with sandpaper so the glue would hold better and then covered it in wood glue and epoxy and clamped the pieces together. This turned out to be a mistake. In my haste to get everything together before the epoxy started to set, I didn’t line up the two parts properly. They’re not even close. This isn’t the first time I’d make a costly mistake with glues, either.
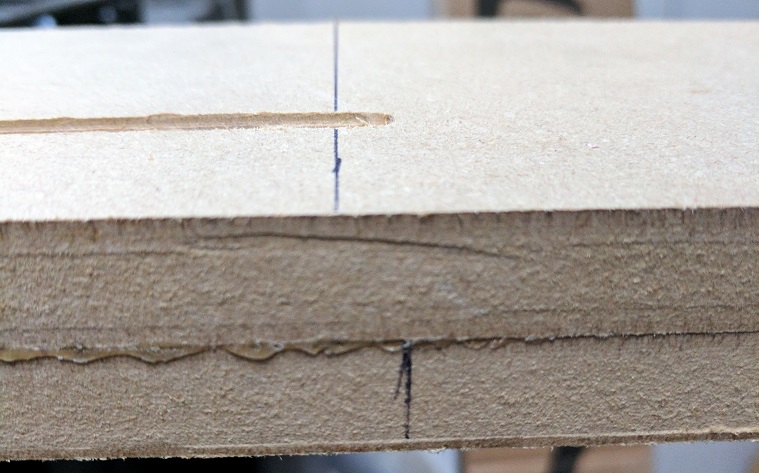
D’oh. I also realized that the grooves I’d cut to hold the acrylic light diffuser and EL wire are only 2-3mm deep - much too shallow to contain both the 2mm acrylic sheet and the 2.6mm EL wire. Double D’oh. I decided to attempt to repair the damage rather than just starting over.
I placed a wide chisel along the sides of the groove and tapped it lightly to cut the fibers and prevent tearout while I cut the groove deeper. I then used a quarter-inch chisel along the bottom of the groove to deepen it. Finally, I ran a ball-end bit along the bottom using my rotary tool for the EL wire. That worked… less well, since it’s nigh-impossible to cut a straight line when the tool itself is pulling to one side erratically. Fortunately, that part shouldn’t be easily visible so it’s OK. Finally, I marked a line around both sides of the blade to show where the grooves shuld end and filled in the gaps with Bondo.
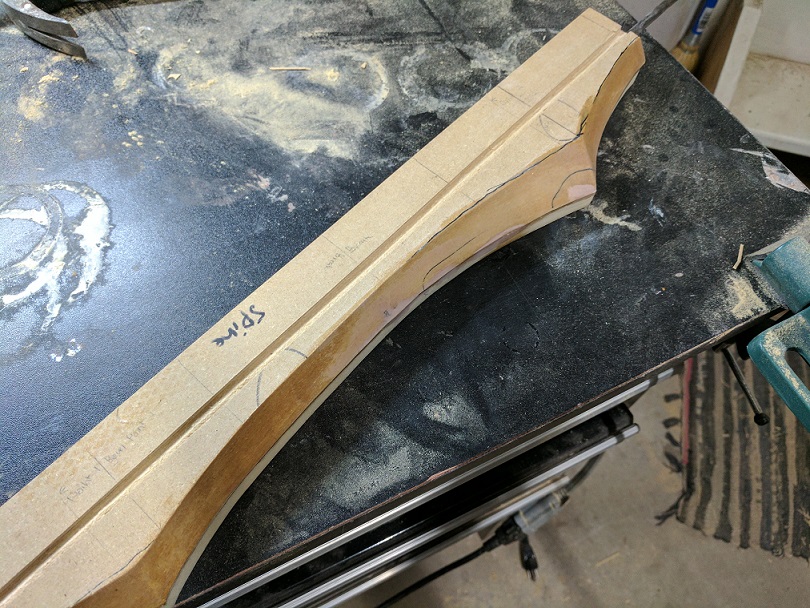
The edge bevel on Penny’s Sword is quite complex, and doesn’t have the same angle along the length of the sword. I cut as much on my scrollsaw as I could. Unfortunately, the sword is too long to fit entirely on the saw. In the end, I hat to cut most of the edge bevel with a couple of hand files and a rasp. That actually worked quite well. It took hours and a lot of elbow grease, but there’s something satisfying about patiently working with hand tools until the part is Just Right. If you plan to do this at home, be sure you know how about Draw Filing. If you don’t, the idea is that you hold one end of the file in each hand, press the center against the work and push it forward and draw it back. I’ve found this technique to be much faster and more controllable than filing along the length of the file using a sawing motion.
Once that was done, I spread some Bondo on some of the areas where I’d filed too far and sealed the MDF with cyanoacrylate. Thin CA is best for this, as it soaks deeper into the MDF, but my bottle of thin CA was so old that it turned into thick CA all on its own. Regardless of the viscosity though, when the CA hardens you’re left with a rough but hard and nicely sandable surface which won’t soak up paint the way unsealed MDF does. It’s even wet-sandable, if done carefully.
With that, plus some more sanding and spot-putty work, the blade was ready for primer.
Blade Details
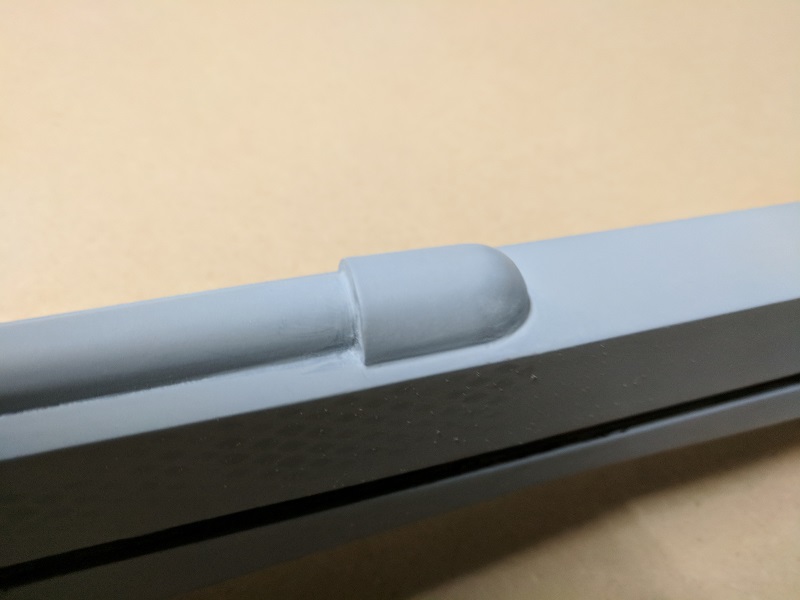
To make the half-round rail along the spine of the blade, I cut a piece of 1⁄2” dowel down the middle very carefully on my scroll saw, then cleaned it up by rubbing the flat side of the now-half-round-ish dowel along a file. I glued that down as straight as I could manage and cleaned up the seam with filler primer, files and sanding twigs. For the larger half-cylindro-spherical (yeah, I had to look that up) bit at the end, I cut a piece of 3⁄4” dowel in half and cleaned it up as before, then used a sanding drum on my rotary tool to sculpt the half-sphere part. This actually worked remarkably well. I couldn’t get it to be quite round enough with just the rotary tool, but some work with a sanding sponge and filler primer got it close enough. The inner corners between the two parts and the spine of the blade are hard to reach so they’re not as clean as I’d like, but they’re probably good enough.
There are some additional details on either side of the blade, but those had to wait. Those details are on top of the diffuser for the glowy sections on the sides, which created an order-of-operations problem. I had to install the EL wire and the diffuser before I could add those details, and then I had to paint those detail bits and the rest of the blade after the diffuser was installed. So I had to mask out the lens and try not to get any paint on it.
There is also an oblong piece on either side of the blade where it meets the guard. I intially tried cutting these out on my scroll saw and sanding them to the right shape, but I couldn’t quite get it right so I ended up just laser-cutting them at the makerspace instead.
Guard
Oh boy. This thing gave me so much trouble. As I mentioned above, I don’t have a lathe and wouldn’t know how to use one if I did. That means I really have two options for making this piece. I could cut it on the CNC mill, or I could 3D print it. I don’t really like either one (CNC milling is a hassle and 3D printing is boring) but needs must. I haven’t had much experience on the CNC mill at my local makerspace, and I’m proud to say that I’ve added a number of shining new mistakes to that experience which I hope to not repeat.
Because this part had to be cut on both sides, I needed to be able to flip over the work piece without actually moving it relative to the bed of the CNC machine. In this case, this meant drilling a couple of holes through the material into the sacrificial board on the bed of the machine, into which I could place pieces of dowel. In theory, I could then flip the material over, make sure the dowels are seated in their holes in the sacrificial board, and carry on cutting on the other side. In practice, standard drill bits combined with the much higher RPMs of the mill caused nasty tearout. Another piece of sacrificial material on top of the workpiece would probably have helped.
This CNC machine doesn’t have a tool-changer, so I had to manually replace the tool multiple times during the cut. To do that, you need to adjust the origin for the height axis to reflect that the new tool is longer or shorter than the old one. If you reset the other axes, though, it’s impossible to finish the cut, and that’s exactly what I did the first time. The second time, my work piece came loose and I was informed that I had the movement speed of the CNC router set far too high. Since this CNC machine is someone’s home-brew DIY project, it’s somewhat lacking in documentation. Fortunately nothing was damaged except my MDF.
Having wasted several hours, damaged a couple cutting tools and destroyed two blocks of MDF, I decided to just print it instead. This actually worked, which is nice. It took a lot of sanding, puttying, priming and repeating before it looked smooth enough, but I did get there in the end. I even printed in the 1⁄4” holes on either end to attach it to the rod inside the blade, though I had to use a 1⁄4” rat tail file to open them up a bit.
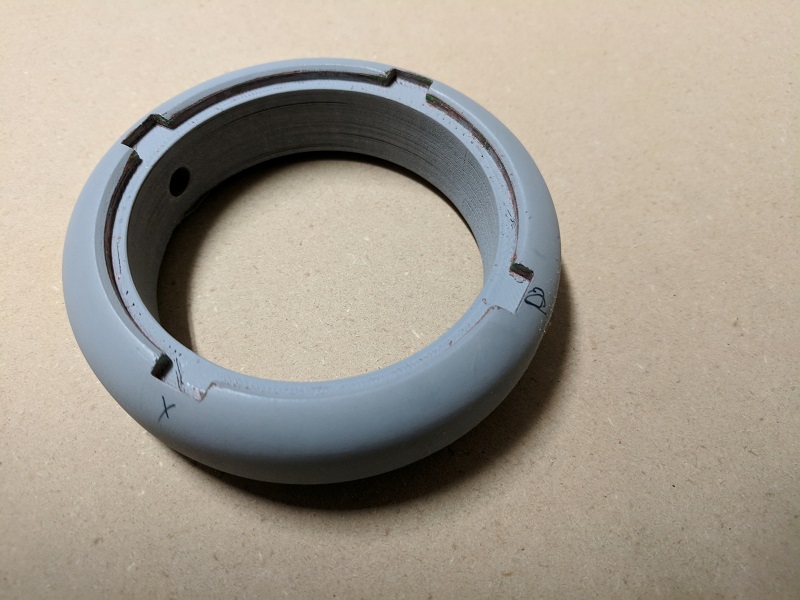
The guard also has some other parts. First, some flat segments to turn the ring into a complete guard, which I laser-cut from acrylic and then finessed a bit with my files until they fit into the ring. Second, there are some sections that are raised above the center of the guard and have a power-symbol design that lights up. Those were also laser-cut from MDF and acrylic. All of these small MDF pieces were filleted with a sanding sponge, sealed with CA and primed.
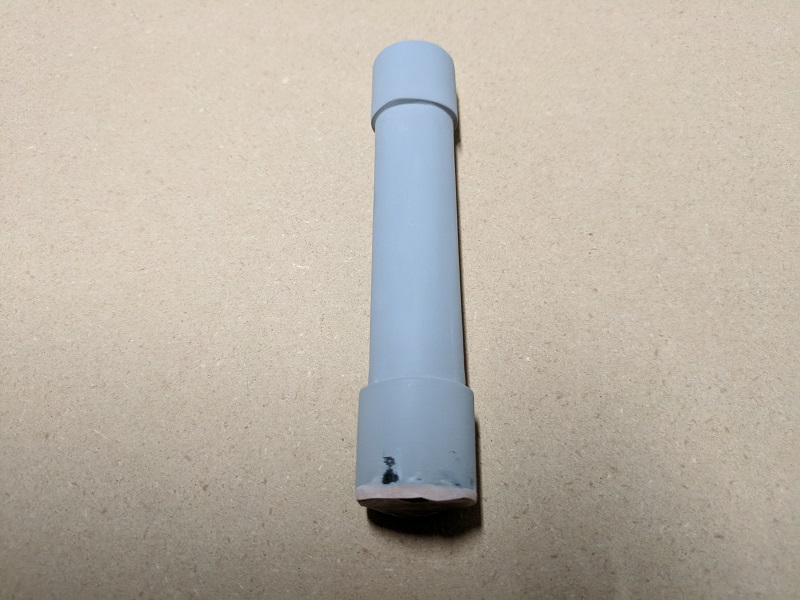
Hilt
Compared to all of that, the hilt was actually quite easy. I cut a couple of sections of dowel to about twice the necessary length and took them to the makerspace. After some failed experiments with the drill press, I asked a couple of the guys there to help me with using the lathe to drill along the center of the dowel. I’ll be honest - they did the work for me (thanks Al and Scott!). Then I just cut the oversized dowel in half and had two hilt-sized bits of wood which fit nicely on the 1⁄4” rod extending from the blade. One real one and a backup in case I messed up the first one. Helpful tip - always make spares.
I had planned to try to use a spokeshave to cut the round dowel, but the spokeshave was too dull to cut with when it arrived. I really ought to learn how to sharpen blades. For now, though, I just clamped the dowel down in my vice and went at it with my files and a sanding sponge. I’ve yet to find a more versatile tool than my cheap set of hand files from Home Depot.
The hilt has a raised section on either end. Initially, I thought I’d heat up some 1mm styrene, wrap it around and glue it in place. This didn’t work (probably because I was trying to use a hair dryer and hot water. Maybe a heat gun would have worked). After puzzling about it for a while, I came up with a better idea. I cut a strip of thinner styrene which was flexible on its own. Then I wrapped that around the hilt multiple times, using styrene cement to glue each layer to the one beneath it like a roll of tape. This left an edge where the styrene strip ended, but some filing and sanding blended that in nicely. The styrene cement bonded the styrene to itself but not to the wood, so I mixed a bit of epoxy and glued the two styrene end-caps to the dowel.
This all worked pretty well, but the two end-caps weren’t quite flush with the sides of the hilt. I fixed that by scooping some baking soda into the gaps, tapping it a bit to get it inside, and then scraping away the excess. With the baking soda filling the gap, I dripped some thin CA (by this point I’d bought a new bottle) inside. Baking soda causes CA to harden instantly and take up more space than CA normally does, so this filled in the gaps nicely. A bit more work with some needle files and sanding twigs to clean it up and it was ready to go.
Conclusion
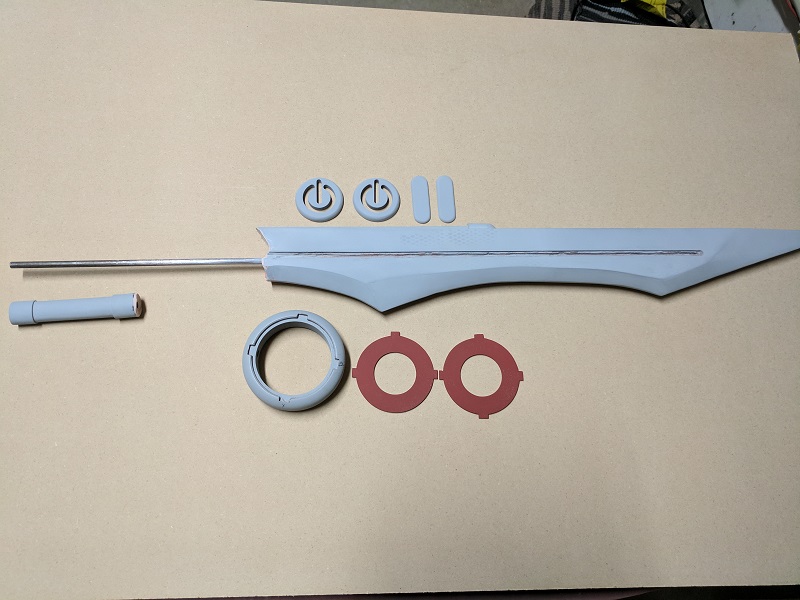
This is getting quite long, so I’m going to wrap up here. Almost all of the parts are shaped, refined and primed. In part 2, I’ll explain how I painted, wired and finished the sword.
Here’s what all of the pieces look like so far:
Tools and Materials
Here’s a short list of some of the tools and materials I used in this post: